New to Sundra? Here’s a quick walkthrough to get you from a fresh upload to a polished, exported caption file — and make the most of the platform along the way.
1. Uploading videos to the dashboard
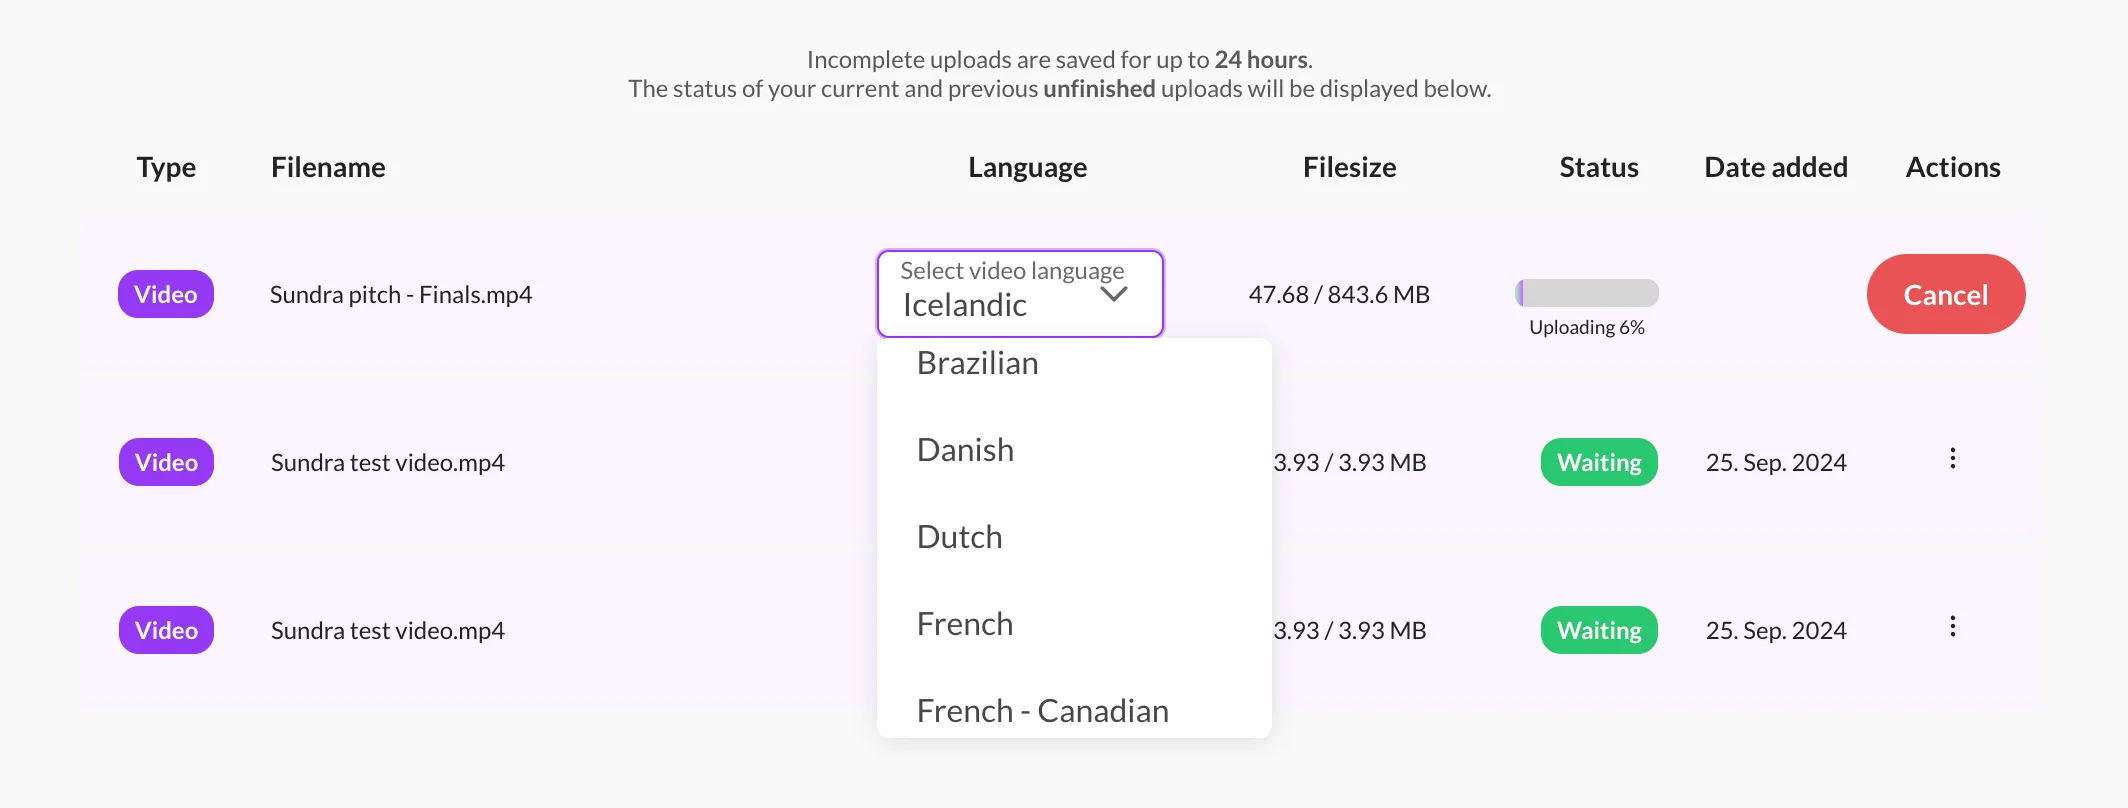
The first step is uploading your video on the Dashboard page. Before — or while — it uploads, select the correct source language from the dropdown. This is what Sundra uses to generate the captions and transcription, so getting it right matters. If you forget, no problem: click the three dots next to the video in the dashboard to set the language afterwards. Once the upload finishes, you’re ready to edit captions.
2. Editing captions and timecodes
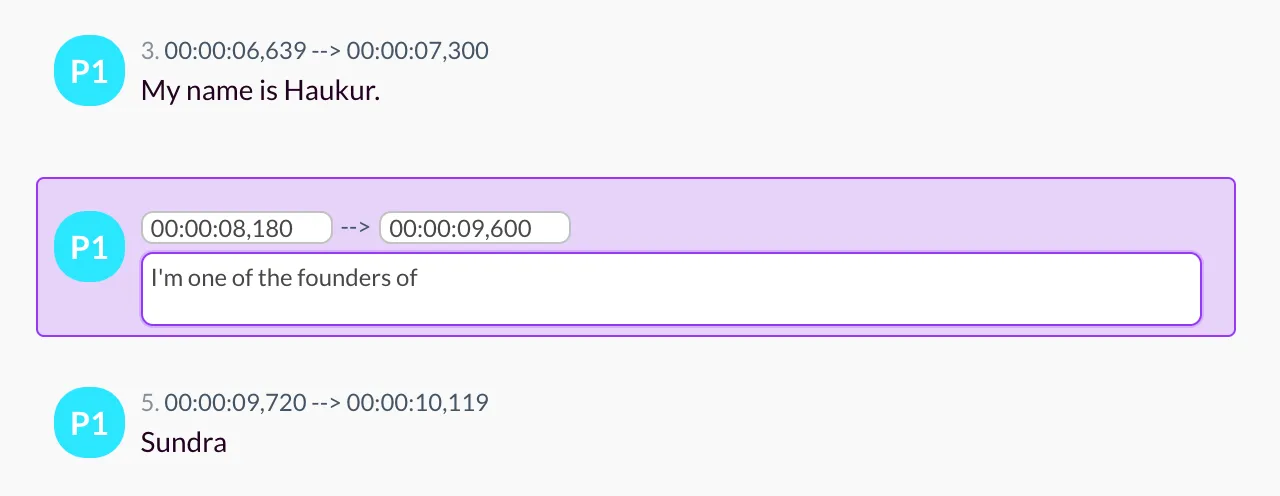
Head to the Captions tab and open the file you just uploaded. You can edit both the caption text and its timecodes directly — click any line to update it, and changes save automatically the moment you click elsewhere. For longer captions, refresh the page now and then to confirm everything saved correctly.
3. Using the “Edit Time” feature
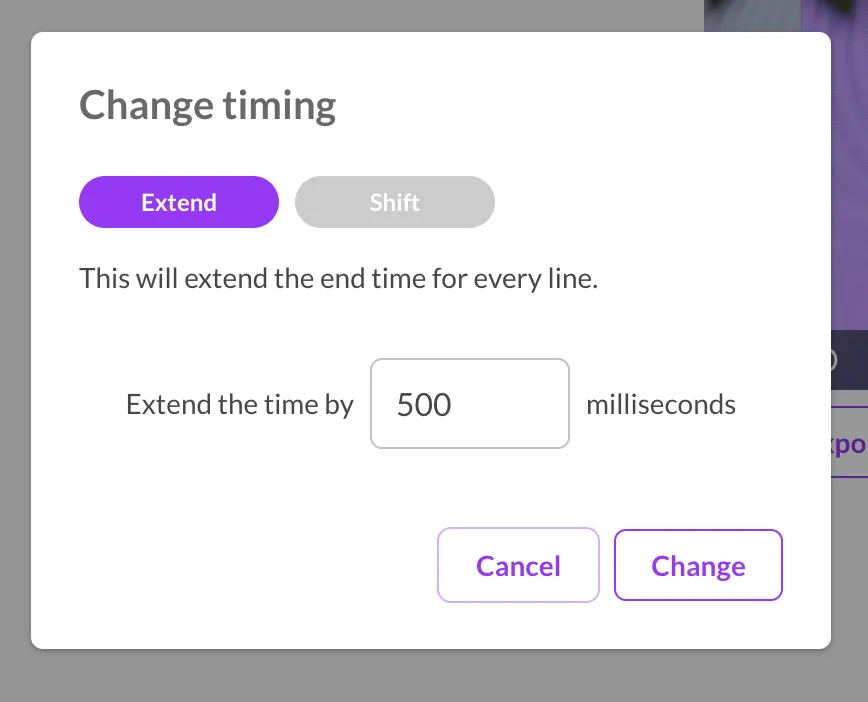
Sundra’s Edit Time tool lets you adjust when captions appear on screen — across every line at once. The Extend Time option adds a set number of milliseconds to the end of each caption, which is useful because auto-generated captions typically vanish the instant the speaker stops talking. That can feel abrupt; letting captions linger for a moment gives viewers a more comfortable reading experience. We recommend extending by 500–1000 milliseconds.
The Shift option moves every caption’s start and end by a fixed number of milliseconds — handy if your captions are consistently running ahead of or behind the audio.
4. Translating your captions
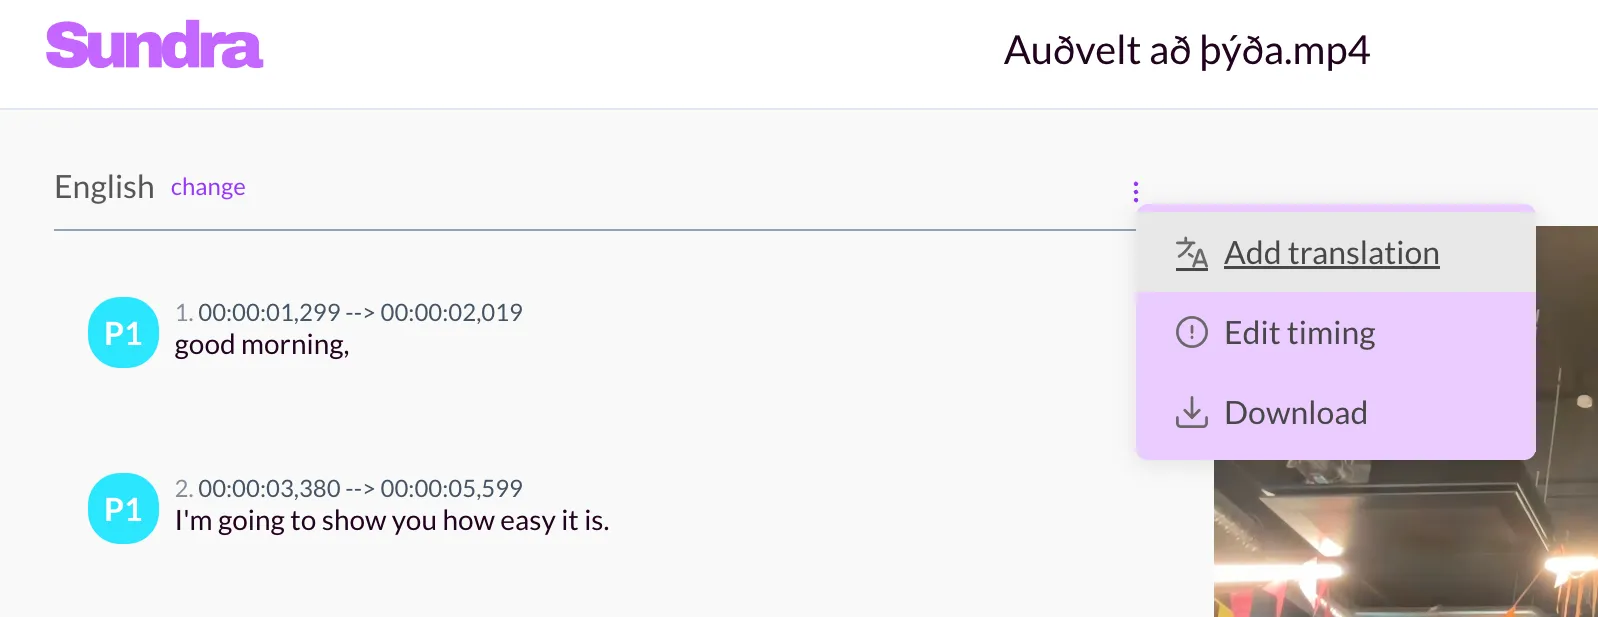
Before translating, we recommend cleaning up the source-language captions first — the cleaner the source, the better the translation. When you’re ready, click the three dots in the top-right corner of the captions view, select Add translation, and pick the target language.
To switch between captions in different languages, click Change next to the caption title.
5. Exporting your captions
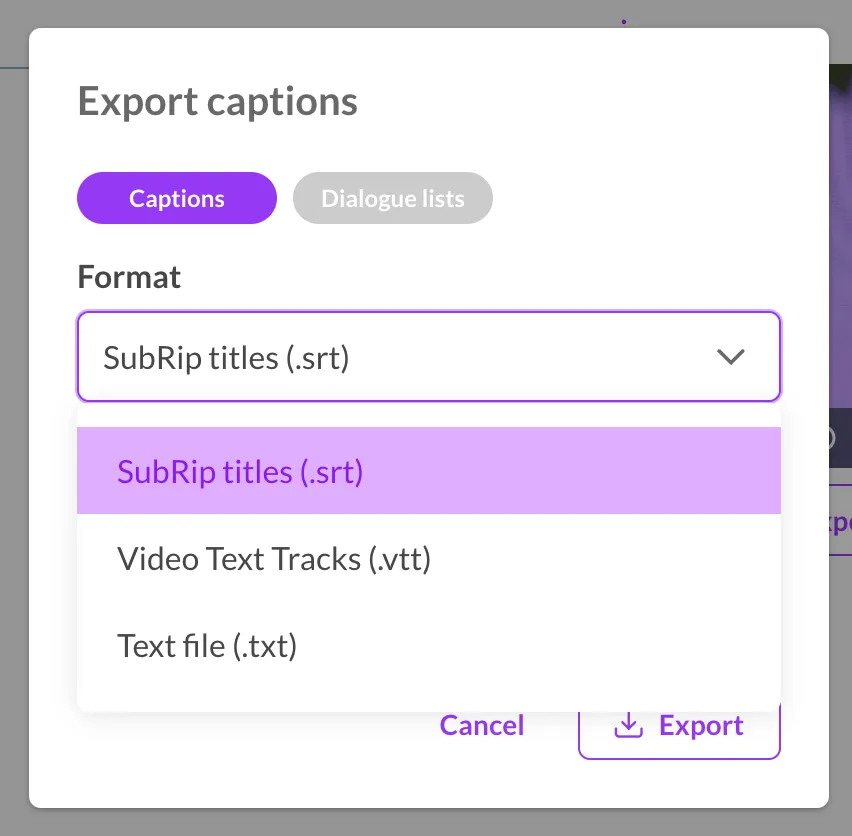
When your captions are ready, exporting is straightforward. Download them in SRT, VTT, or TXT (for plain transcripts). Sundra also offers a dialogue-list export — still in active development, with speaker identification on the way.
In conclusion
Sundra gives video creators everything they need to produce accurate, polished captions fast — inline text and timecode editing, timing adjustments, translations into 70+ languages, and multiple export formats. Upload your video, fine-tune the captions, and export in whatever format fits your workflow.
Follow these five steps and you’ll be shipping captioned content with Sundra in no time.