Good captions are easy to read at a glance: lines that aren’t too long, a font that suits your brand, and enough contrast to stand out against any background. In Sundra, all of that lives in a caption style: a set of appearance settings saved to your workspace, so every video can look the same.
The most important setting is the line width. Instead of pressing Enter to break long captions by hand, you tell Sundra how many characters fit on a line, and it wraps every caption for you.
Before you begin
Open a captioned video from the Library. Everything in this guide happens in the Captions panel on the right of the editor, and the player shows your changes as you make them.
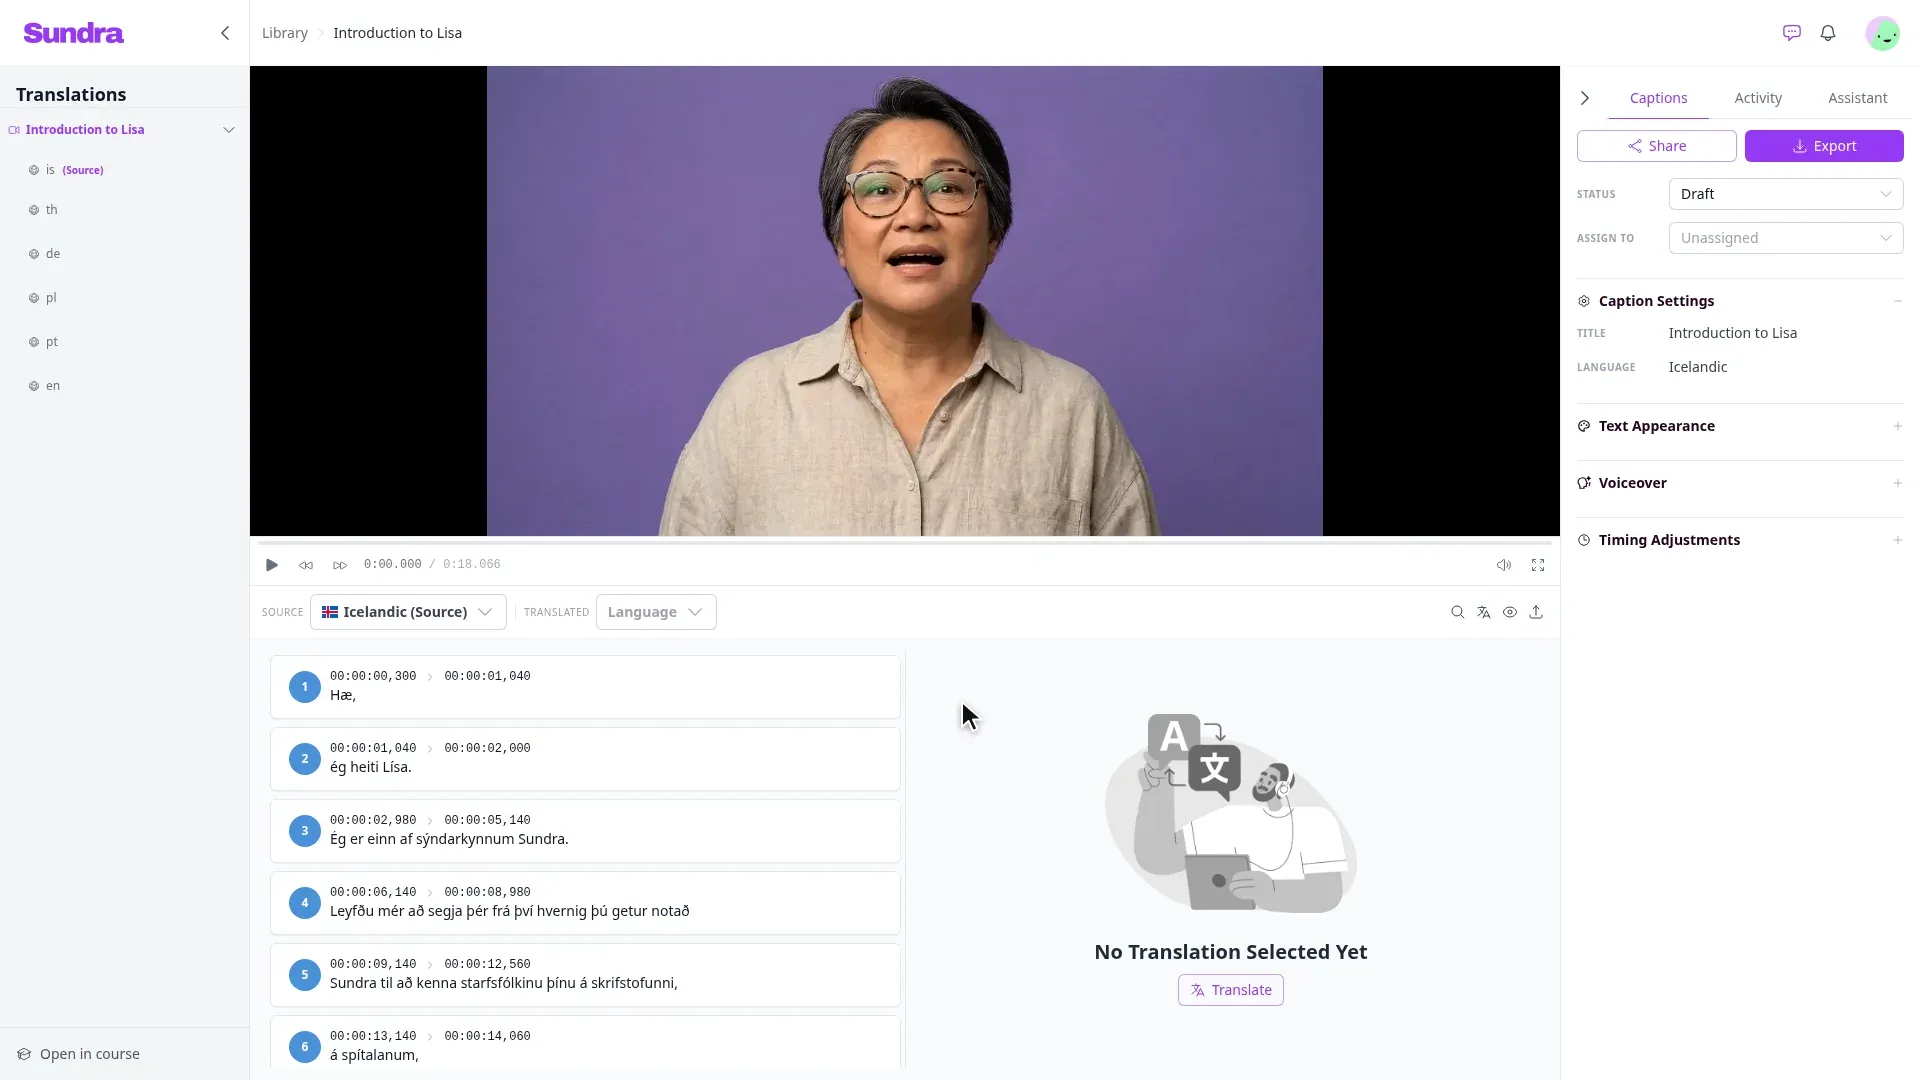
Step 1: Open Text Appearance
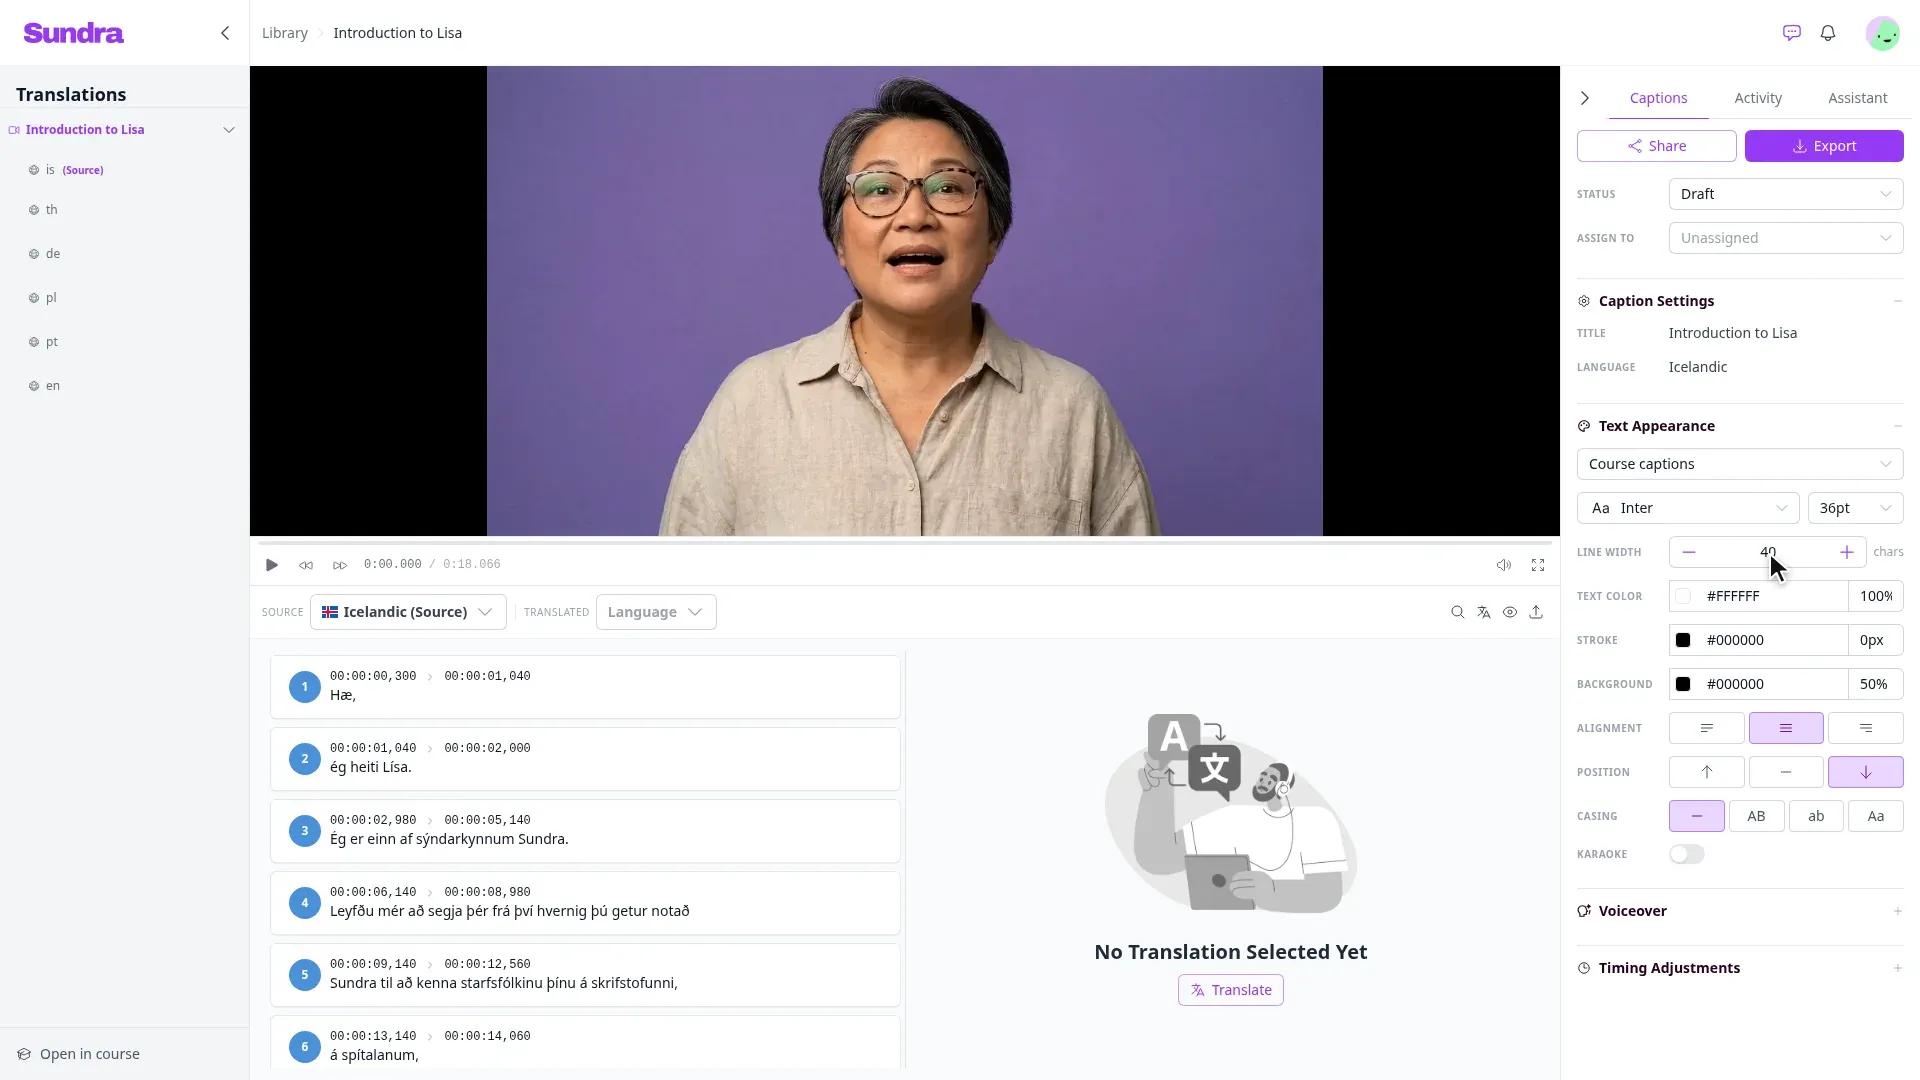
In the Captions panel, click Text Appearance to expand it. It shows the style the video is using (Default to begin with).
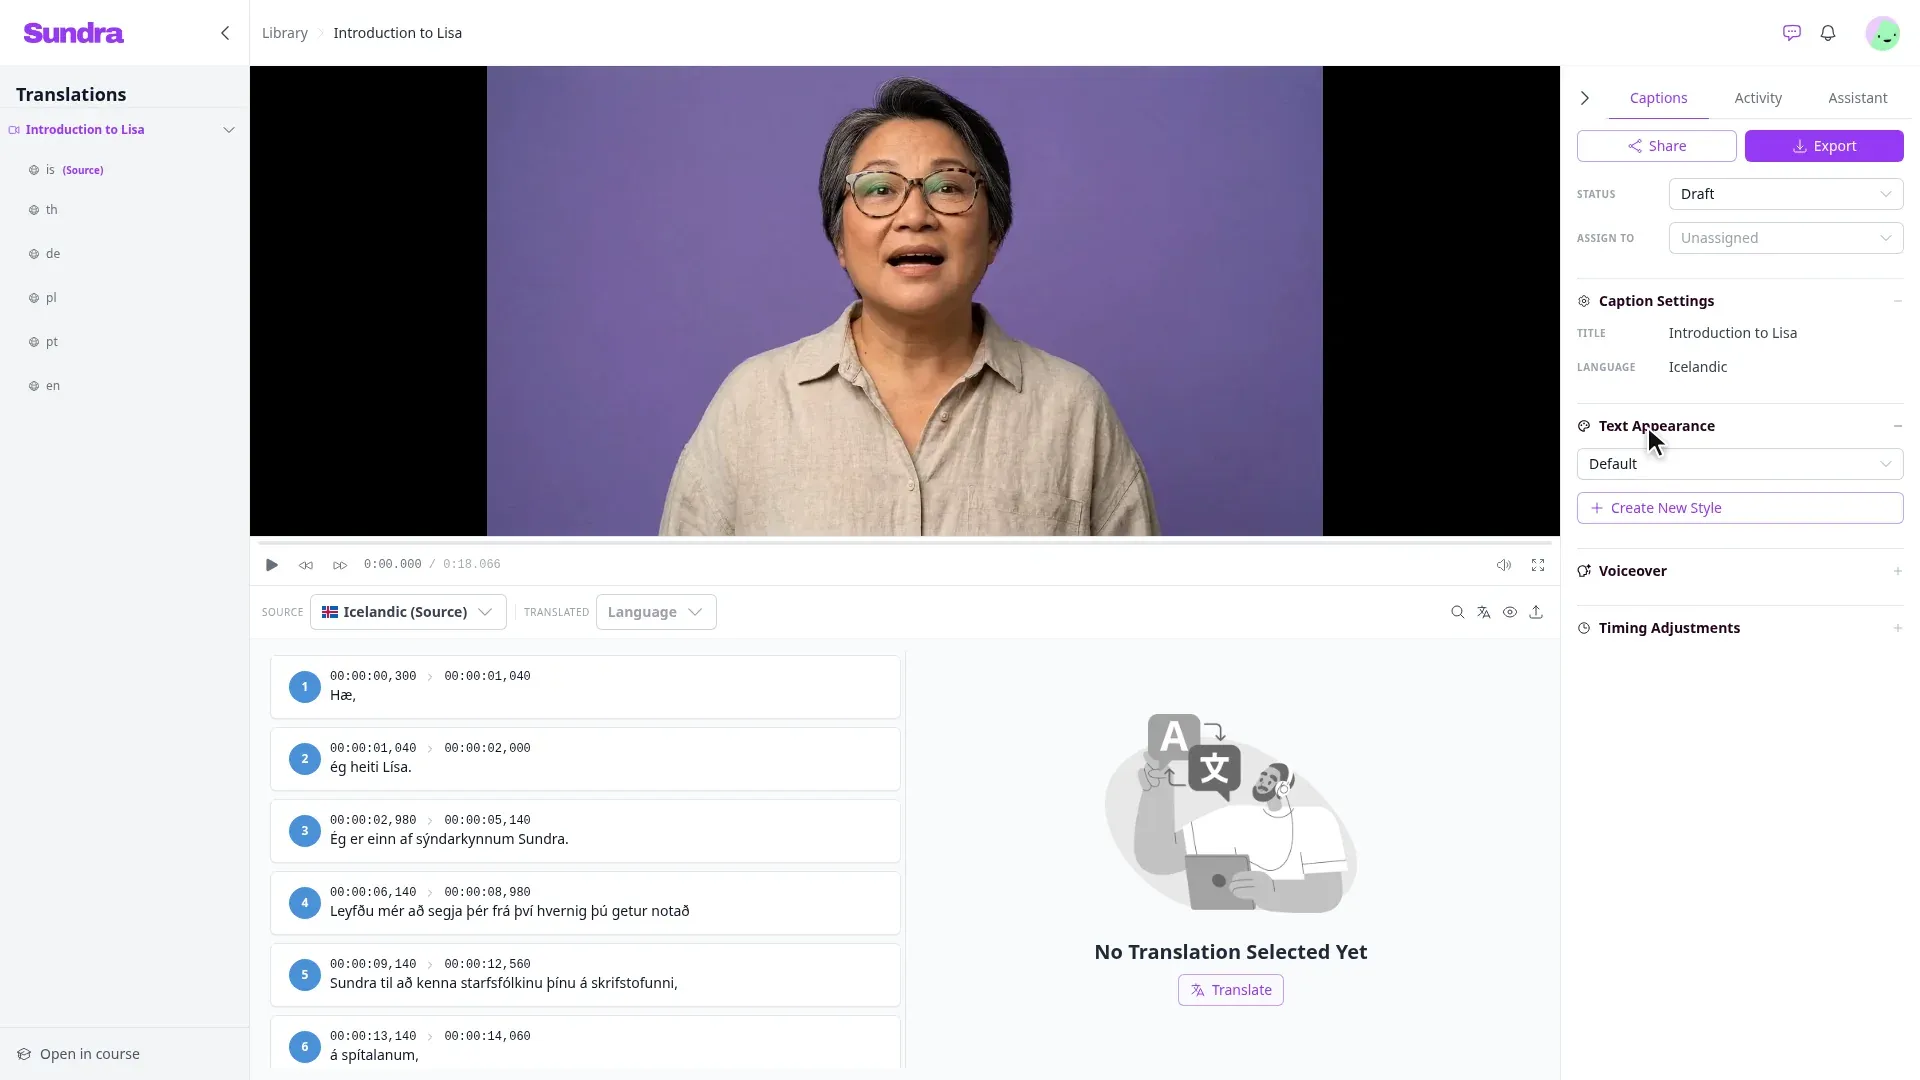
Step 2: Create a new style
Click Create New Style.
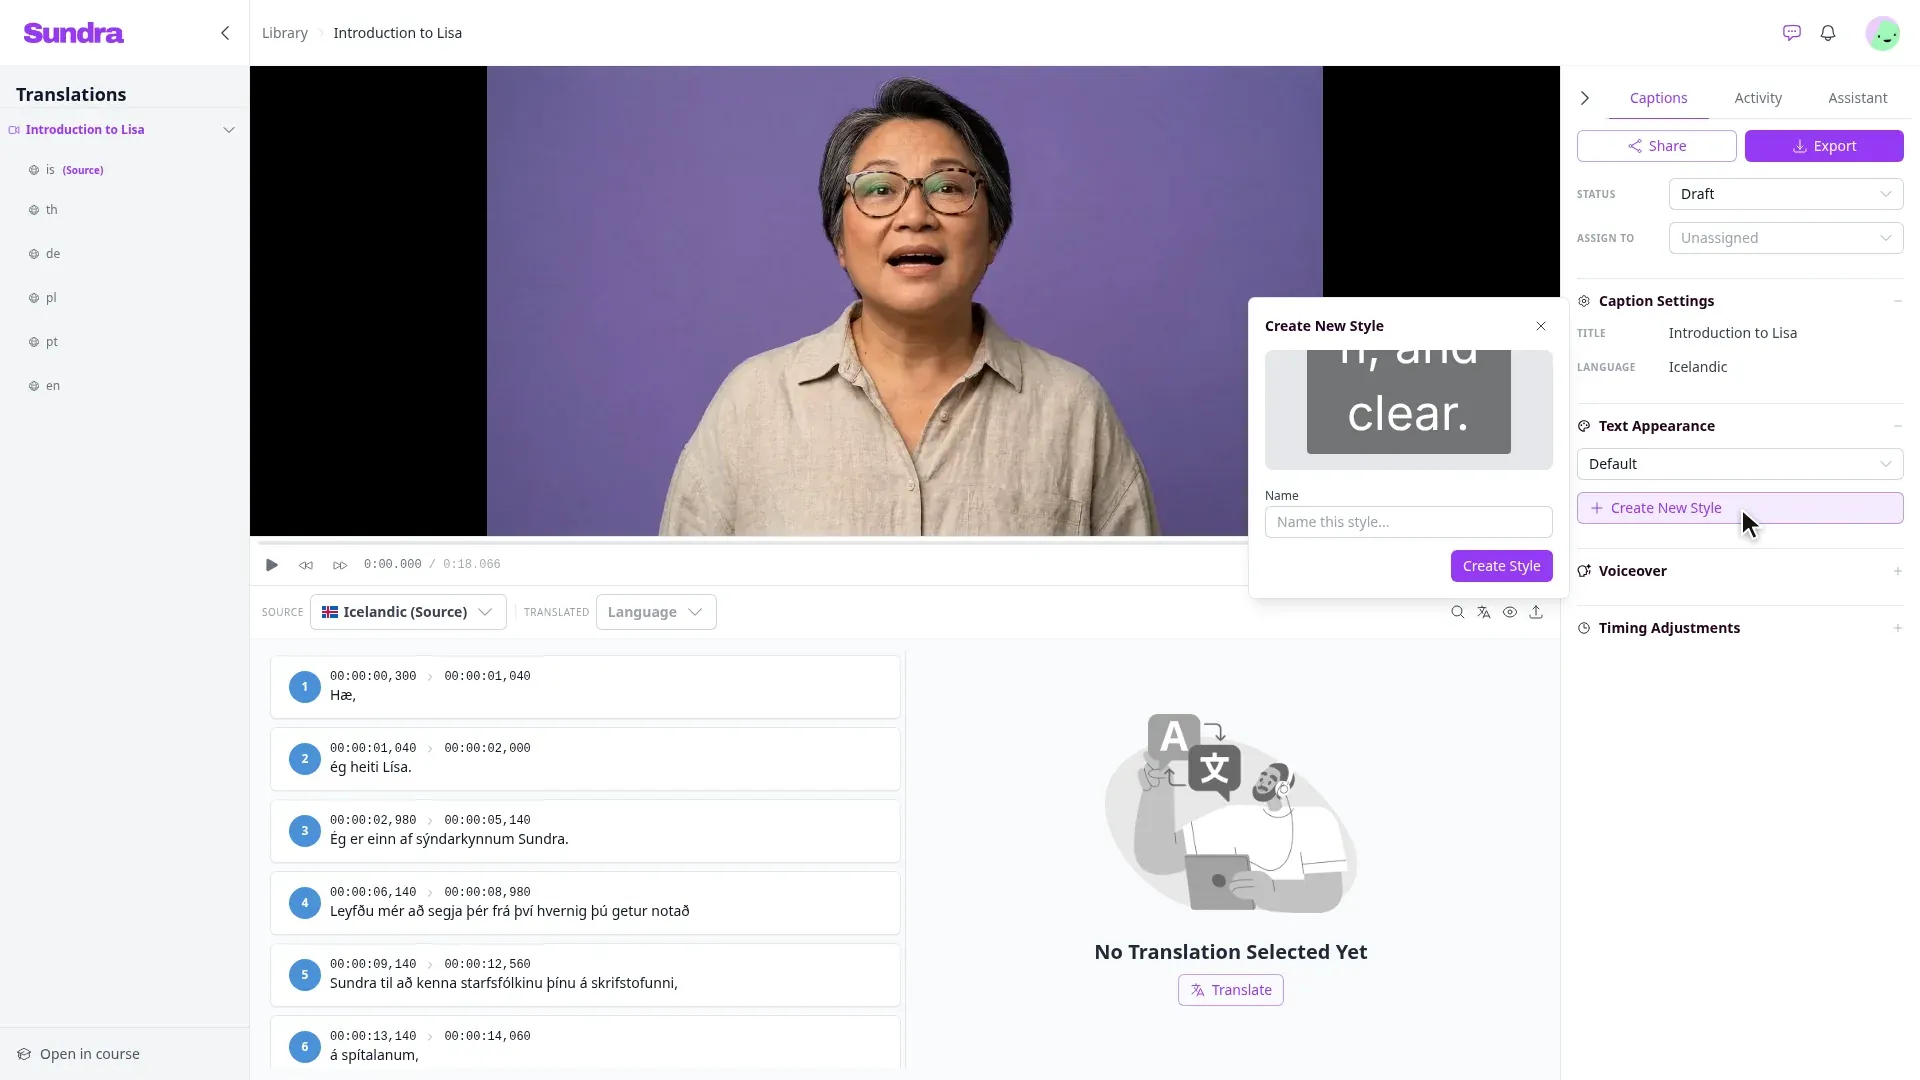
Step 3: Name your style
Give the style a name you’ll recognise later (for example, Course captions or Social clips) and click Create Style. The new style is selected for this video straight away.
Step 4: Set the line width
Line width is the maximum number of characters on one line of a caption. Use the − and + buttons, or type a number. Any caption longer than that breaks onto a new line automatically, at a space between words.
Around 35–42 characters reads comfortably on most screens; go lower for videos that will be watched on phones or in vertical formats.
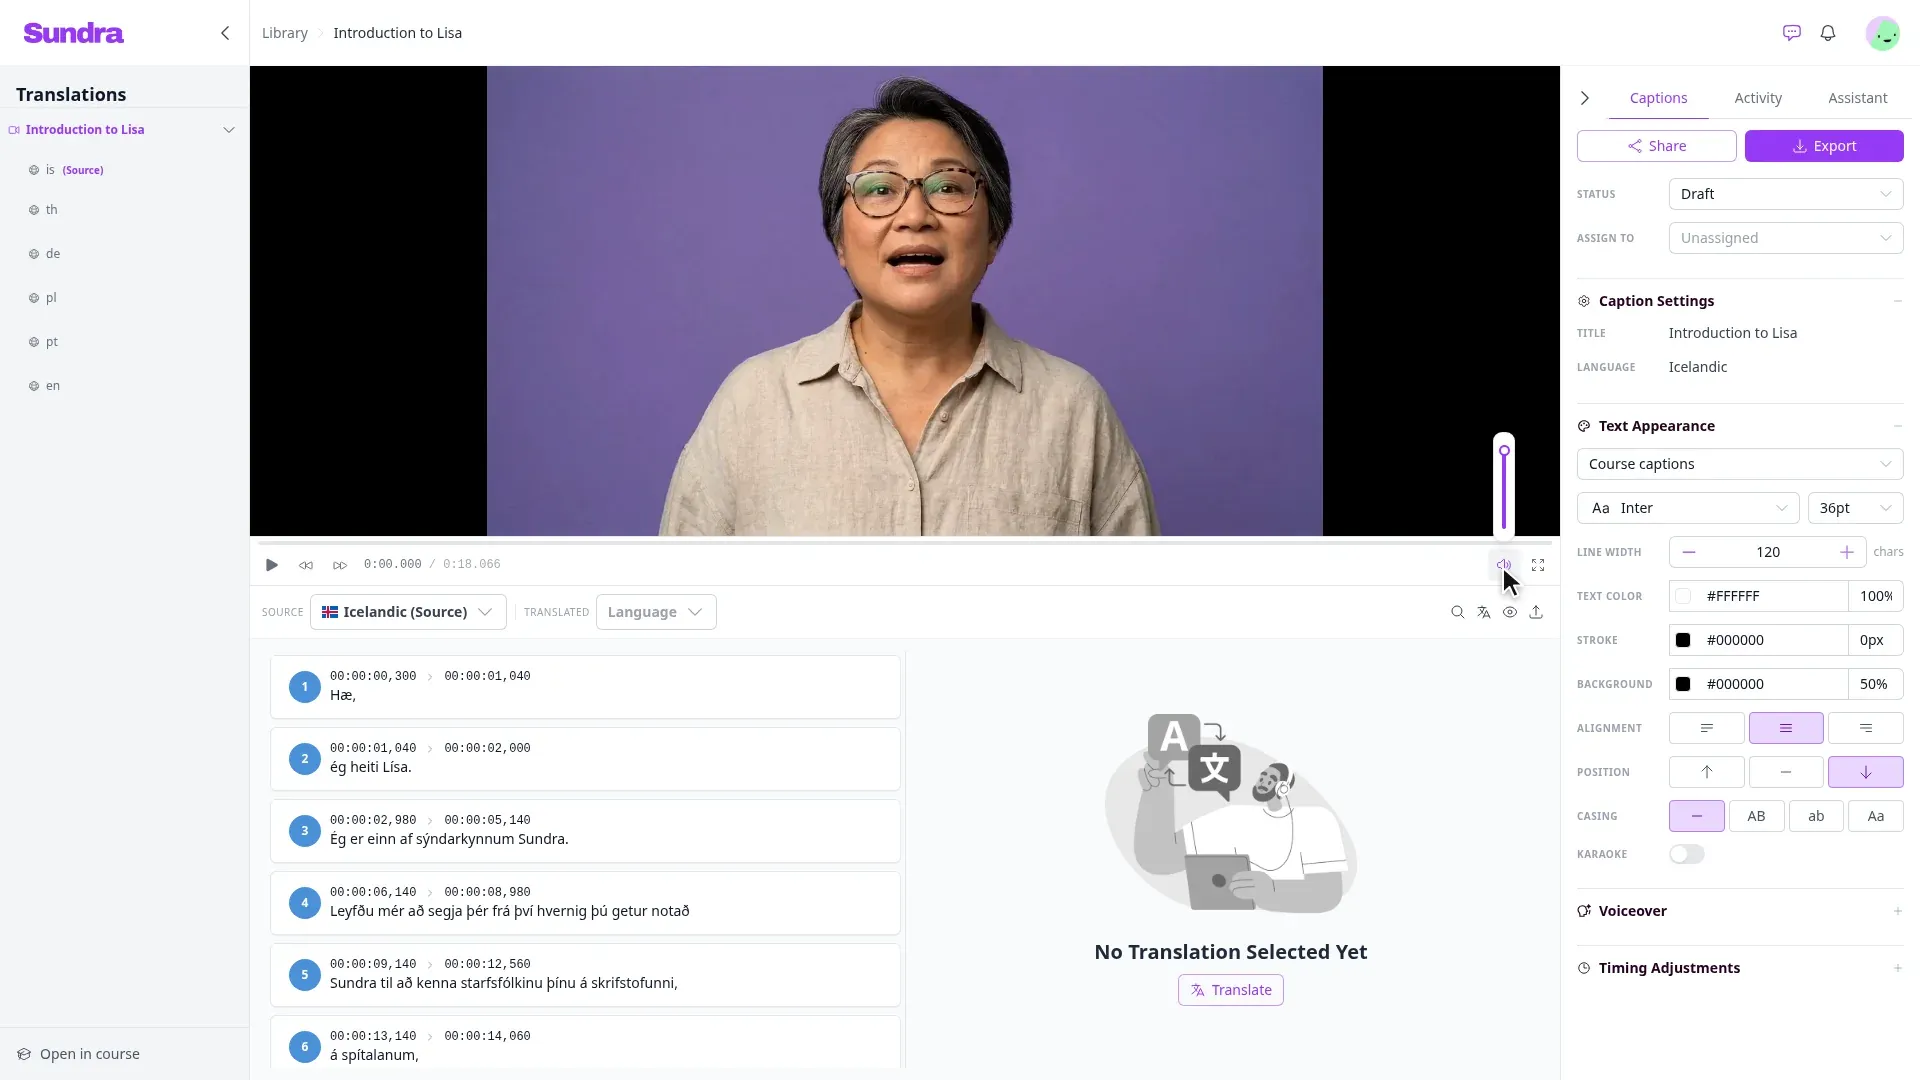
Step 5: Adjust the appearance
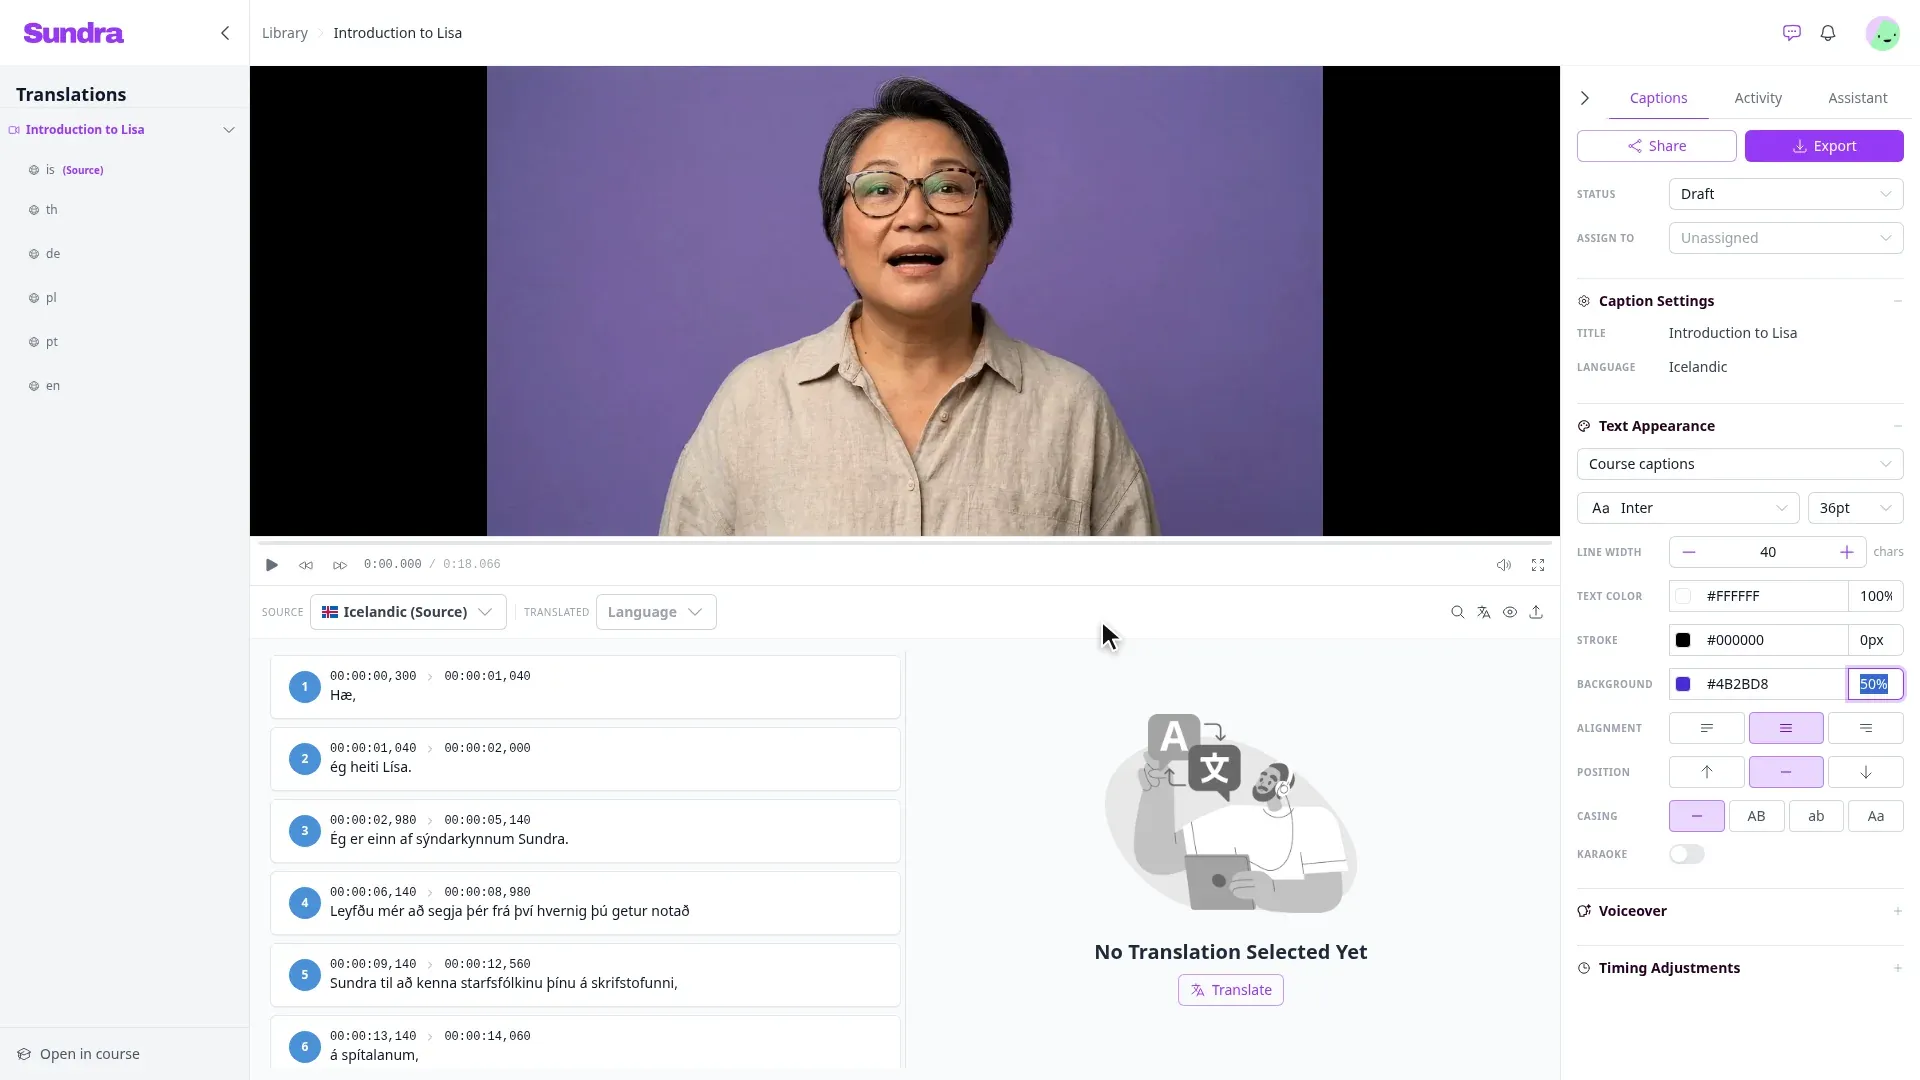
Fine-tune the rest of the style. Every change shows in the player straight away:
- Font and size: pick any font from the list and a point size.
- Text color: with an opacity percentage.
- Stroke: an outline around the letters, with a colour and thickness in pixels.
- Background: a box behind the text, with a colour and opacity. A semi-transparent dark background keeps captions readable over busy footage.
- Alignment: left, centre or right.
- Position: top, middle or bottom of the frame.
- Casing: as typed, ALL CAPS, lowercase or Title Case.
- Karaoke: highlights each word, in a colour you choose, as it is spoken.
Step 6: You’re done, and changes save automatically
There’s no save button: your changes are stored in the style as you make them. Because styles belong to your workspace, you and your teammates can pick the same style from the dropdown on any other video.
Good to know
- What you see is what you export. Burned-in subtitles are rendered exactly as they look in the player, so set the style before you export a video with burnt-in subtitles.
- Line width only changes how captions wrap. Your caption text and timing stay as they are.
- One style per purpose. Keep separate styles for different outputs: for example, a larger, narrower style for phone-first social clips and a wider one for course videos.
That’s it!
Your captions now break cleanly and match your brand on every video. Questions? Reach out to us at hello@sundra.io.